Wednesday, February 27, 2008

Cowboy Birthday


Today is my dear sweet husband's birthday. I would have loved to do something big for him but I think I will wait for his 40th birthday. So instead, I am having my parents over for some requested bbq'd tri-tip and I am making a mudpie for his cake- yum!


I had a lot of fun making his birthday card- I have been wanting to use this cowboy but never knew what to do with him... so with yesterday's color challenge on SCS I had the perfect stage for this cowboy. I was able to use a lot of items that I haven't used in a long time! My card base is a 5 1/4 square piece of River Rock cardstock with the fold at the top. The cowboy is stamped in Staz-on Jet Black and the Genuine is stamped in River Rock classic ink on whisper white cardstock. They are both from Stampin Up!'s Bronc Buster set. I used the word window punch to punch out "the one and only" and put on with thick mounting tape. I used the star from Urban West rub-ons and a pewter build-a-brad for the star. There seemed to be too much blank space so I used my color spritzer tool and black stampin write marker to fill in the emptiness. I also used the paper piercing template to pierce the bottom right side. The white paper in the back is stamped with the canvas background stamp in river rock and the weathered background in black staz-on. The edges are all distressed with black ink. I tied natural hemp twine around the back piece 3 times and tied in a knot. The inside of the card says "Wanted: Happy Birthday" from Wanted and It's your birthday sets.

It's usually difficult for me to come up with a masculine card but I felt like I succeeded with this one! Have a great day!

Monday, February 25, 2008

A chance to play!

So I finally had a chance to play with my new Always set from Stampin UP! I only used the bird- which I really adore. It has such a simple elegance. Unfortunately the reason for the card is due to the death of a friend's mother-in-law. A very sad time for the family.


This is a simple layout for an easy and fast card. I eyeballed my measurements since I wanted the bird centered on the Very Vanilla cardstock. I used the black staz-on since my black classic pad made the bird look purple- not the look I was going for! The staz-on gives such a nice, clean and dark image. I used basic gray cardstock behind the bird image and then basic black for the paper behind that. I used my scalloped blade on my cutter for the decorative edges. The background paper is Charbon DSP (retired) and the "So Sorry" is from Fancy Flexible Phrases (also retired). Unfortunately, the rhinestones on the bird are not picking up in the photo- they add a lot to the look. I also used the basic gray taffeta ribbon which softened the black that was used on this card. I can't wait to do more with this set! The SCS gallery has hundreds of beautiful samples for Always.


What have been your favorite new sets to use? Do you have a "go to" set when you need a quick card and don't have a lot of time to plan a layout? I am just trying to use my sets so I am always reaching for a different one.


On a more personal note... When I lived in SoCal I had a 400 sq.ft. basement room that was for all of my crafts and storage- I had a great space. It was layed out well and I knew where everything was. But when we moved here to northern CA I lost my space. So I moved into the mini basement and we just yesterday finally finished cleaning it up. I had a little space to work but not a friendly environment (it's open to underneath the house- which means spiders!) So a little later I will post some before and afters and a picture of what I had in SoCal.

Thursday, February 21, 2008

My birthday cake!


Look what my kids made me today for my birthday:

I am back but not able to play yet.

I had a great trip to Maui- we got back 2 days ago. Evan was a perfect little travler- not a tear the whole trip- serioulsy. The weather was beautiful, the resort was beautiful, the beach was beautiful... life was good. I felt sane for the first time in 6 months. Everything was so peaceful and relaxing. I was ready to see the kids again but not ready to leave paradise. I came home to a very sick little girl- she's been running a fever now for 4 days. A temperature of 102-103.5- my poor girl. With that she has this hacking cough that she almost hyperventilates from. So needless to say that I have not had any opportunity to be crafty.

Wednesday, February 13, 2008

Teacher's Valentines

I finally got these finished today. I've been wanting to make something like this since seeing similar projects over at Splitcoast. They can be so versatile- as fancy or as simple as you want to make it.

I used the Starbucks Frapp bottles- I enjoyed the coffee, peeled the labels, use "goo-gone" to get the sticky goo off and then put them in the dishwasher. The next thing I did was paint the sticks green (I used shish-ka-bob sticks) with green acrylic and let them dry. I then used the SAB Rub-ons Love & Happiness on the bottle. ( I used the brown on one and the olive on the other.) I punched out the scalloped circles from Berry Bliss and a retired DSP (cannot remember the name of it- it matched the Polka dots and paisleys set) and from Close to Cocoa and Old Olive cardstocks (I used those for the back of the flower). I used the 1/2" circle punch for the center of the flower. I used liquid mono-adhesive to attach the flowers to the peppermint patties. One flower has a center stamped from Riveting (an old hostess set from SU!). I stamped it then colored the inside heart with the pretty in pink stampin write marker. I stamped it twice then punched out the heart and adhered it onto a pewter build-a-brad. The "stems" have ribbon tied for a petal effect. Then I used chocolate satin, pink taffeta, rose grosgrain and mellow moss grosgrain ribbons to tie around the neck of the bottles. Then, I filled the bottles with m&m's and placed the flowers in. I had to trim the sticks to get them different levels.

Hopefully this was explained clear enough- I have so much on my mind- trying to get ready for my trip. I have got to go pack and prepare! Talk to you when I get back!

Tuesday, February 12, 2008

New Changes!

So while I am supposed to be getting things ready for my trip I got sidetracked... happens easily. What do you think of the changes I made to my blog? If you saw it before, which do you like better? Is there something that needs to be changed? Is it easy to read or is it hard on the eyes? Please post a comment letting me know your thoughts. Thanks for your time... now off to get ready (at least until I get sidetracked again).

Hawaii, here I come!

So I am leaving for Maui, just a short trip, Thursday morning so I will be absent for a little bit! If I am able to get everything done that I need to I will post a picture of the Valentine's we are making for Ryan's teachers. So I had better get off the 'puter and get to work... laundry, clean house, pack, clean out the fridge, hmmm... I have more to do than I have time!


I just had to say real quick that my daffodils are beginning to bloom! We just bought this house this past summer and the previous owner had been a nurseryman. We have over 70 roses, about 30 winter blooming Camellias (AMAZING!), fruit trees, etc. Well now I have the winter/spring surprise where I am seeing all of the bulbs that he planted! I have tulips, daffodils and a couple others that haven't bloomed yet so I can't wait to see what they are! When I get back I will post some pics of what is blooming- but for now I will show you some pics I took of my roses in October:


Talk to you soon! I am off to do the hula!


Monday, February 11, 2008

All that glitters...

I am really liking this new Chunky Glitter from SU! It's really sparkly and girly! This little Valentine card is on a Very Vanilla Scallop Note with a 4" x 2 3/4" piece of pretty in pink cardstock glued to the inside of the card (the right side). The Close to Cocoa cardstock on the front is pierced using the paper piercing template in the Mat Pack as a guide. I used marvy scallop punches on Berry Bliss DSP for the layers and put a Chunky Glitter sticky heart from Sticky Cuts Letters on top. The ribbon is Pretty in Pink Taffeta and has a Pewter Build-a-brad anchoring it down. I used the 1/2" circle punch to punch out the pink center and put on a SAB Love and Happiness rub-on in the center. The 2 small brads are from the Pewter Hodgepodge Hardware.

The "happy day" and flower in the inside are also from the Love & Happiness rub-ons that are available in the Sale-a-brations catalog. It's a very sweet little card and I hope my best friend enjoys it.

Friday, February 8, 2008

My first lightbulb idea!


I was so excited last night- I had my first real lightbulb moment in crafting. (I haven't seen this idea anywhere else and I did a search to make sure I hadn't pulled this idea from my long term memory...) I have been wanting to make a nugget tin for so long but haven't been able to get the nugget tins- sold out, more money than I wanted to spend, etc... Also, I was thinking if a nugget tin was given to a non-crafter, what would they do with it after the chocolate was all gone? Would they toss it? If so, that's expensive trash. So I wanted to come up with an inexpensive and quick idea... and I also wanted a nice way of decorating this packaging... hmmm... RUB-ONS! I could have decorated this further but I was so excited and it was close to midnight and I wanted some sleep... So what do you think?


I used the plastic card boxes that I had gotten from Papertreyink. Ten boxes for only $6! And if you use the boxes for cards, you can use rub-ons, also. I made this card for my husband for Valentine's Day. I had painted a heart from SU!'s On Board Accents and then used the new SAB Run-ons. I used my new photo corner punch on Berry Bliss DSP and some pink taffeta ribbon with a flower slide from Hodgepodge Hardware- silver. It looks like I used rub-ons on the bottom right but that is on the plastic box the card is in.
The lighting is a little bit better in this picture of it (left). My camera battery is low so it isn't taking very good pictures.
I will show you my small Valentine card for my best friend tomorrow. It's on Splitcoast
right now if you want a sneak peek.
Have a good weekend!

Thursday, February 7, 2008

Grandmother's 90th Birthday

Andy's Grandmother is turning 90 this month! Wow- she has seen a lot of change in her lifetime. Do you ever wonder what the changes will be in our lifetime? Are we going to have flying cars? Are we going to take vacations on the moon? Imagine what the changes will be for our grandchildren! I wonder if when our grandparents were yound they had any idea of where the world would be when they were 90? Hmmm... I think that may be as deep as I can go today- the cold is still slowing down my brain synapses.


Anyway, I needed a card to send up to Canada for her birthday party... My mom had just lent me her Pretties kit to try out since she hadn't used it in 4 months. I really like the embellishments inside- I just am not sure what to do with the flowers. I tried my watercolor crayons on them and wasn't impressed with my ability to make them look nice. I will have to try dying them or using my pens. I think chalking them would look the same as the watercolor crayons. The card dimesions are once again 4" x 81/2". I used the hatpin and beads from the Pretties kit, the retired DSP Enchanted (I think), brown satin ribbon and a large flower from Prima. The "Birthday Wishes" is from SU! Since Salutations.


Hope you all have a great day! I am off to go play outside- I finally heard the birds chirping this morning for the first time in a while- so I knew it was going to be a beautiful day!


Wednesday, February 6, 2008

"Emergency" Thank you


My 5 year old's school had a minor- but could have been huge- emergency on Monday forcing them to go into "shelter mode". Everyone had to get indoors and seal shut all doors and windows and nobody was allowed on or off campus. After about 30 minutes they had police and fire escorts off campus. It was scary but they did such a great job. They had "practiced" their drills in the past but this was their first evacuation. The school is on the main thoroughfare through our city so it caused major congestion when it was closed down for approx. 12 hours. It took me 1 1/2 hours to get to their evacuation site when it is less than 2 miles from my house... but when I got there the kids were all singing songs and having a great "field trip". I had asked my son when we were in the car if he was a little bit scared and he looked at me like I was a nut and asked me "Why would I be scared?" That made me feel so good since I was really nervous.


Anyway, I thought I would make the staff a card of appreciation for taking such great care of our children... I know they were just doing their jobs but they did it with a lot of love.


The card is my new favorite size- 4x8 1/2. I apologize, I didn't measure the layers- just eyeballed the size I wanted. But the base is soft sky textured 12 x 12 cardstock, then purely pomegranite cs, then blue bayou dsp, then p.p. again, an adhesive backed non su paper than very vanilla cardstock. The stamp set used is True Friend by Stampin UP! I stamped the stem and petals in Wild Wasabi and the flower in blue bayou and purely pomegranite classic inks. I used my Round tab punch and blue bayou dsp for the tab. The "thank you" is from Fancy Flexible Phrases and is embossed with white embossing powder. The center of the flower and the tab have the rhinestone brads from the Pretties kit and the bottom right corner has just a silver brad. Purely Pomegranite satin ribbon is tied around the center. It turned out pretty.


The kiddos returned to school the next day for an uneventful day- thank goodness! But unfortunately the "events" happened at home instead. My husband stayed home sick from work- thankfully! My 5 year old was trying to get something up high in his closet when he fell and smacked his forehead on a shelf splitting his little head open. I was nursing the baby at the time, my daughter was freaking out at all the blood, hubby was in bed... he probably should have gotten a couple of stitches but he was so terrified of getting shots that we decided to call our nurse friend and she came over and cleaned it good and butterflied it shut... it was along the hair line so it won't be totally noticeable and plus, "chicks dig scars!" That's what I tell him. So while we are tending to my son, my 3 year old daughter decides to help us out by bringing my 3 month old to us... we are hearing this horrible squeaking cry to find my daughter carrying him with her arms around his neck!! He's fine but was not happy and my daughter is crying hysterically because of our reaction to seeing her carrying him that way... she was just trying to be helpful... oh, I cannot imagine if my husband had not been home!


Hope today is better! The funny thing is my hubby is trying to convince me we should have a 4th child. After days like these I just laugh at the thought!

Friday, February 1, 2008

I am ready for summer...

I love the rain but I am ready for the sunshine! We have had such a wet and cold winter (for this part of CA) which has made it possible to really enjoy the snow and the mountains. But this is coming from a girl who just moved here from Huntington Beach- Surf City USA. Where there is 7 miles straight of big beautiful beaches, where I was used to wearing shorts in January, where I rarely had to turn on my heater... I want summer. Ok, I will take spring first. So when I saw Beate's weekend sketch I new what stamp set I wanted to use. It's the set called Green Thumb by Papertrey.

I have never made a card with these dimensions before- I really enjoyed it! It is 8 1/2" x 4"- it fits into a business size envelope. Anyway, I was really happy with how this card turned out- it makes me want to go on a picnic. I have 3 packs of the Cerise DSP that I have been wanting to use- I just love the polka dots on the DSP with the polka dots on the strawberries. The sketch called for 3 squares but I thought my strawberries needed to be round and scalloped- don't you agree? I used my white gel pen to add the dots at each scallop. The small flowers on the left are green and red mini Primas held together with a silver brad.
I will most definately be making more cards this size and with this layout- thanks Beate.
I am enjoying trying all of these new things! Next I want to try a new technique- like broken glass or masking... now to find the time and a few extra hands.
Goodnight!

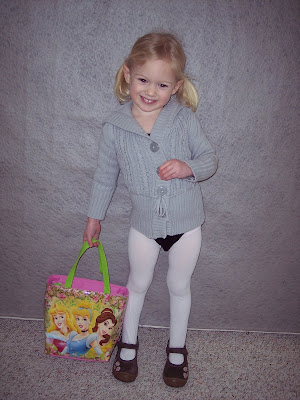
My Little Ballerina!

My three year old just had her first dance (ballet/tap) class today. I couldn't take pictures in her class but had to show how stinkin' cute she looked! She loved her class and her teacher. She just jumped right in and gave it her all- it had to be the cutest thing ever!

Anyway, typing one handed while holding my littlest... I had to share.